We will be using Paint Shop Pro, Animation Shop, and
Microsoft Word for this lesson. Other graphic programs may work
in a similar manner. The purpose of this lesson is to create a simple
animation of text that you can add to your web page.
STEP #1: First you must decide what word to use that would
relate to the topic of your page. Because there are many steps to this
process you should choose a short word for your first attempt.
STEP #2: Go to Microsoft Word. You want to make sure you
can see the toolbars needed to create colorful text. To do this click
on the view tab in your main toolbar. Click on toolbars
in the drop down menu. In this drop down menu you want to make sure the
following boxes are checked: Standard, Formatting, Drawing, and
WordArt.
STEP #3: In the Drawing and WordArt toolbars you will see an
icon that looks like a blue capital 'A' tilted. Click on either
of these icons to bring up the WordArt Gallery. Choose which style you
would like to use by clicking on the box. You may wish to experiment
with a few before you make your final choice. The Edit WordArt Text
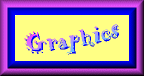
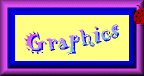
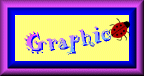
box will appear. Type in the word you wish to use in the text window.
Next choose how you want your font to look by selecting the style of
font, size, and whether you want it bold or italisized. I would suggest
using size 36 and bold to start. When you are ready click OK.
Your text will appear using the style you selected.
STEP #4: Now you can manipulate your text using the graphic
toolbars you brought up. Note that you should have small boxes showing
at the corners and sides of your word in order to make changes. If they
aren't showing you only have to click on the word for them to appear.
Experiment with shadows, color, texturizing, shape, rotating, and so on.
If you make a mistake you can always use your undo arrow in your
standard toolbar. To simplify your work later you should avoid long
shadows and 3D effects in your final choice. Before you go on to the
next step you might save this file for safty.
STEP #5: You are now ready to move your word to Paint Shop
Pro.In this step we will have both programs open at the same time.
Once you have opened Paint Shop Pro you will need to return to
Microsoft Word to retrieve your word. To do this you must make
sure your word has the boxes showing around it. In your standard
toolbar click on edit then copy from the drop down menue.
Move to Paint Shop Pro. Click edit, and paste as new
image. When the Meta Picture Import box appears, click on
OK. Your text now appears as an image file. You should save this
file in case you need it again later. Once you have done this you can
close down Microsoft Word.
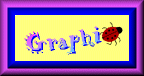
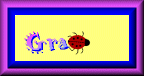
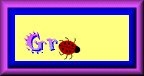
 text image
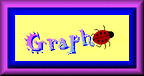
STEP #6: Your text will have a white background. If you want to
change your background color you need to do so before going on. This is
done in the same manner as with the lesson on creating logos. You may
with the text background to match that of your web page. Doing this
will make your text background appear to be transparent. If you need
more space around your text you can create a new image box to paste it
in (using a matching background) or simply add borders of the same
color. If you would prefer to have a border around your image you may
wish to add that at this time.
 color
color  border
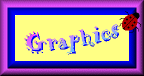
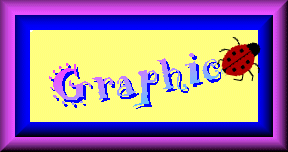
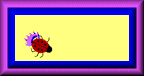
STEP #7: In this step you will be choosing an image that will
move across your animation to make it appear it is producing each
letter of your text. You could bypass this step if you simply wish for
your letters to appear. You may wish to use something simple like a
pencil or paintbrush. You can also use something that is related to
your topic but it should have a clean, solid background that can be
removed. Bring the image you choose into Paintshop Pro. You
will now have to make this image transparent as learned from the lesson
on creating logos. Before doing so make sure your image is 24 bit by
clicking on colors, increase color depth, and 16
million colors. Once you have made the background transparent you
should save the image using Animation Shop to preserve the
transparent background. In the future you would bring the image up in
Animation Shop, then copy and paste it to Paint Shop Pro.
STEP #8: To create our animation we will be working in each
frame in reverse order that they will appear. You will be creating an
image file for each frame of your animation. Move your two main images
to the left of your screen to give yourself room to work. Start by
copying and pasting your main image 5 times as a new image. You might
wish to reduce your original image screen to the bottom so that you
don't accidentally use it for one of your changes. You can make more
images for as many frames as you will be needing as we go along.
STEP #9:You will basically be repeating most of steps 9-10 for
each frame. Start by copying the small transparent image that will move
across your graphic. Click on the larger image and paste the smaller
one as As New Image. Rotate the smaller image to face the
direction you wish by clicking on image, rotate, set the
degree you wish your image to move from the rotate box, and
click on OK. Reposition your smaller image to where you wish it
to appear in this frame. The first frame you create should show your
smaller image moving out of the frame behind the letters. Your original
main image will actually be the last frame of your animation. Move this
image to the right of your screen. You will be stacking each image
created in order. It is a good idea to safe each image as it is
completed. Give each a name that will help you remember the order. You
will need to click on Selections and Select All before you
save the image in order for the smaller image to become part of the
larger image.
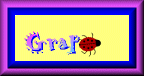
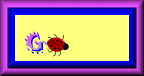
 Small transparent image.
  Position smaller image.
STEP #10:The reason we are creating these frames backwards is
that it is easier to erase part of the text than to build it up each
time. To do this we start with the text image and select the background
color. Using your painting tool you will block out part or all of the
last letter of your word. Remember that if you used a shadow of some
sort you will have to erase the part of it that pertains to the word
you are blocking out. Repeat STEP #9 to position your second image.